|
3/2/2014 0 Comments Handpainted Props - Barrel
Another prop, another wood texture. After my little self-assessment of the crate that I created last week I was eager to apply what I'd learnt. So I opted to work on the texture for the Barrel prop; seeing how it was mostly wood.
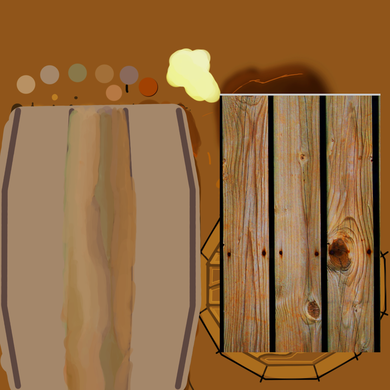
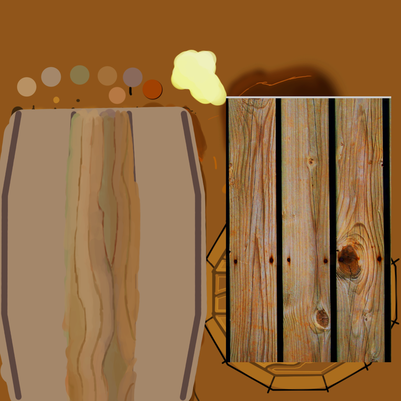
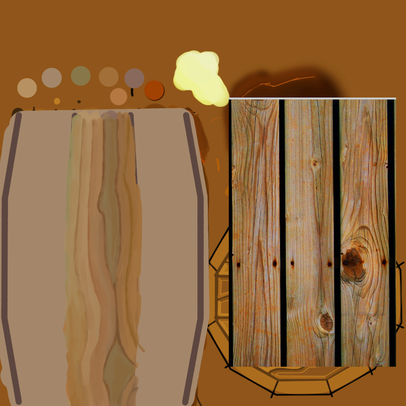
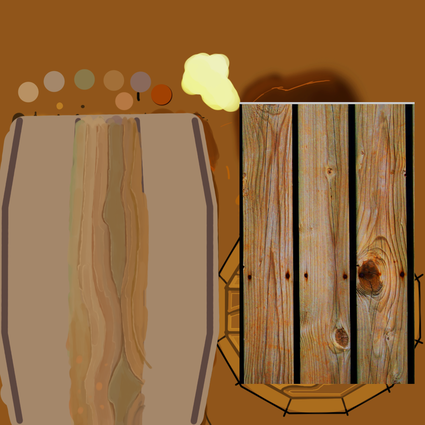
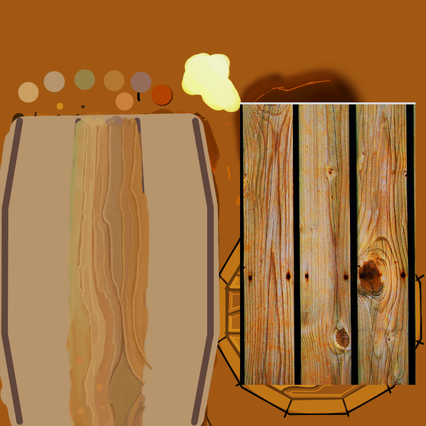
After trawling the Polycount forum for discussions about handpainted textures (wood in particular) I noticed that one complaint that kept popping up was that there was a lack of colour variety; as if people were just focusing on the tones and using a colour overlay. So I decided to live dangerously and experiment with painting the key forms in colour! Using a photo for reference (s'more of that good ol' fashioned Polycount advice) I began creating the first plank. I mostly worked with the canvas zoomed out to 100% so that I wouldn't add any unnecessary detail.
Then I painted in some wood grain using the darker colours from my swatch. And....
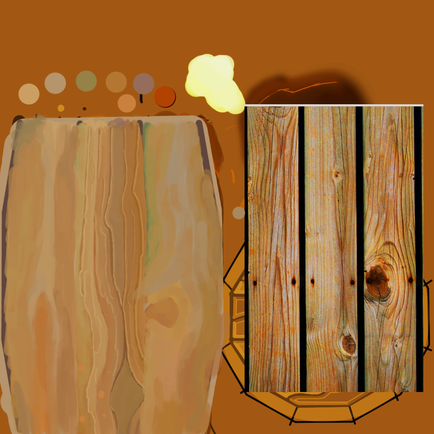
...Touched up some of my initial painting! I cleaned up some of the rougher edges and did my best to define the shapes of the wood.
I used lighter tones from the reference photo to quickly block in some highlights around the wood grain and some other shapes I was finding in the wood.
I pushed up the values a little to make the highlights/shadows pop a bit more and I went back in there and touched up the highlights to make them more visible from a distance.
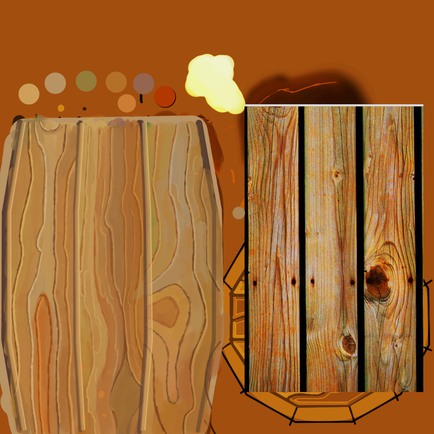
And so with that plank completed I began trying to replicate the process for the other two; starting by painting in the larger forms using the colours found in the reference photo.
It wasn't long before I had the highlights and shadows painted in on each plank and I started work on defining the edges of each plank. I saved the texture sheet as a .tiff and had it applied to the model in 3DS Max so that any changes I made in Photoshop could be seen instantly on the model itself. This made it a lot easier to see when I had pushed the light and dark values too much/too little.
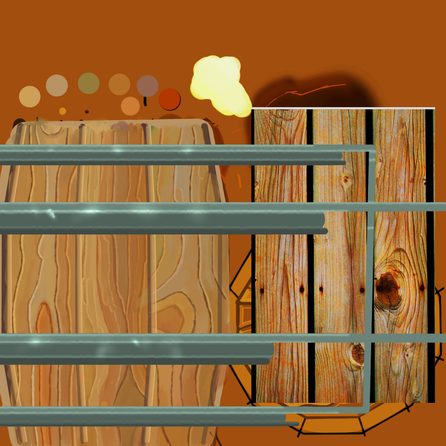
Of course it isn't just wood that makes up a barrel; there's some metal hoops that keep the whole thing together! Painting the metal was simply a case of painting some straight lines across the texture sheet and then painting some equally straight lines of highlights and shadows. I then used the dodge tool to paint in some highlights on the edge of the would-be bevel.
So there it is. I keep on learning things through these little prop exercises. I found that spending less time zoomed in on the texture not only improved the final product but saved me a fair bit of time as well. I also think that starting in colour helped a lot in making the end result look less flat and dull; all those odd bits of green and red add an extra dimension you wouldn't get with the other method.
All that being said, though, I still see room for improvement. I think the wood grain on the first plank I painted is a lot more subtle than that found on all of the others. I'm not entirely sure which is the better look but I think that the way it is now makes the first plank look out of place. Speaking of which, the slightly perculiar shapes that are found on my planks don't lend themselves too well to the tiling texture that they found themselves in; the repeat is incredibly obvious and visible from any angle! I also think there's a lot of work to be done in regards to my metal texture. It's a little too flat and dull to really read as metal, but this is something I can work on in the next prop. I am getting better at that wood, though.... 2/8
0 Comments
Leave a Reply. |
Me
3D Artist, Game Dev and Teacher based in Liverpool, UK Archives
February 2018
|
 RSS Feed